prints, drawings, paintings, web development, blog posts, link to etsy shop
Experimentation Leads to Collagraphs
Experimentation Leads to Collagraphs
In 2015, I did quite a bit of exploring using classic printmaking techniques - things I was already comfortable with and could control: relief printing and intaglio.
 |
| 5-color relief print "Morning Inspiration 1" |
I had conquered linoleum block printing while I was in art school. In going back to it, I challenged myself with new imagery, increasingly-detailed work, and many more layers of color. I had to stay small because my humble little etching press can only print up to 10 inches wide. I've been happy with the results, but I need new challenges and I long to work in a larger format. So far, I've only sold three lino prints and given away countless others. I've had several of my prints favorited once or twice on Etsy. But in my opinion, there are excellent block-print artists out there, and all I can do is admire their work and try to make mine unique in some way. Or do something else.
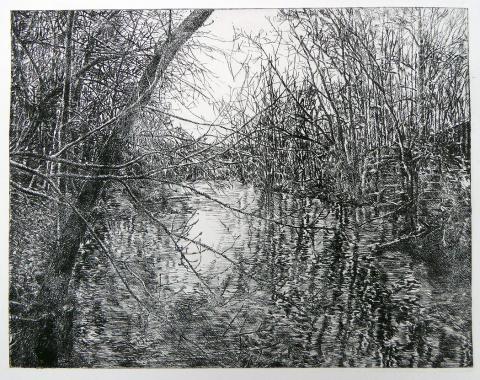
My intaglio prints have also been the result of reaquainting myself with a printmaking technique from school. I didn't feel comfortable using acid in my home studio, so instead of etching, I turned to a method I found online - drypoint with plastic plates. I love drawing, so I began with black and white photo-realistic images using my own photographs. My final drypoint print ("Reclamation") was larger and basically featured a culmination of all I learned about making different linear tones on a plastic plate. Making that plate burned me out both in time and effort, and, although I happy with the result (below), I still haven't put the elbow grease into making an edition yet.
These two printmaking methods have both been made much easier than when I was in art school because I've been able to use transparent materials: transparent linoleum and clear plexiglass plates. There's no need to transfer drawings to the plate - all I have to do is put the plate over my image, then use the image as a guide to carve or scratch my lines.
I found myself wishing to create better tone on an intaglio plate than I could get by just scratching lines. After researching online and reading my old printmaking texts, I decided to experiment with carborundum (silicon carbide) grit. (And there are so many ways and so many tutorials out there, the only way to start is to jump right in.) Adding textures to a plate by gluing down material is a printmaking technique called collagraph (from "collage"). Collagraphs can be printed with both relief and intaglio methods depending on which areas hold the ink. And there are as many ways to build textures as there are stars in the sky.
What I really wanted to do was the opposite of the block print reduction method. Instead of carving away, I wanted to build up the surface. I thought I could print different colors with the intaglio method by using carborundum to hold the ink - the flat areas of the plate would be wiped clean. My first experiment was to create a very rich black tone by coating a rectangular piece of matboard with white glue and evenly cover it with carborundum grit #120 (kind of like sandpaper). I sealed it with acrylic gloss medium, inked it, and printed it like an etching.
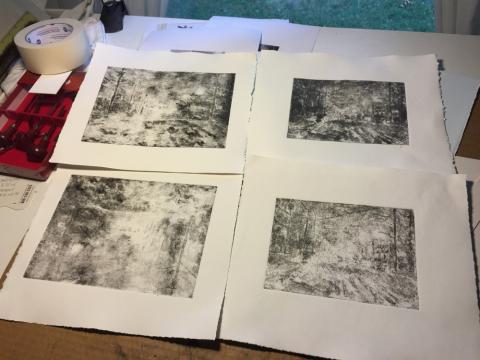
Then everything when to hell. I mixed grit with acrylic gloss medium and tried painting it on a plate (a piece of matboard). For some reason, none of these worked and I have no idea why. I tried different ink, different wiping techniques, different paper, different soak times on the paper, and all I got was a gray mess (see below - although, now that I look back at this photo from several months ago, it wasn't as complete a failure as I thought, I just didn't have fine-enough control over areas of dark and light - maybe I will work more on this in the future).
So I gave up.
And I did a lot of thinking. Maybe it was my method... or my execution... or my lack of practice.
I did more research and experiments and found that STARTING with a carborundum-coated plate, then painting on the gloss medium for the white areas seemed to work MUCH better than building up the surface with dark areas. This might very well be the true opposite of a reduction print (an "addition" print?). Unfortunately, something else caught my attention, and my experimentation with this new method stopped there, for now... to be picked up at a later date.
In my next blog, I'll tell you what happened next.